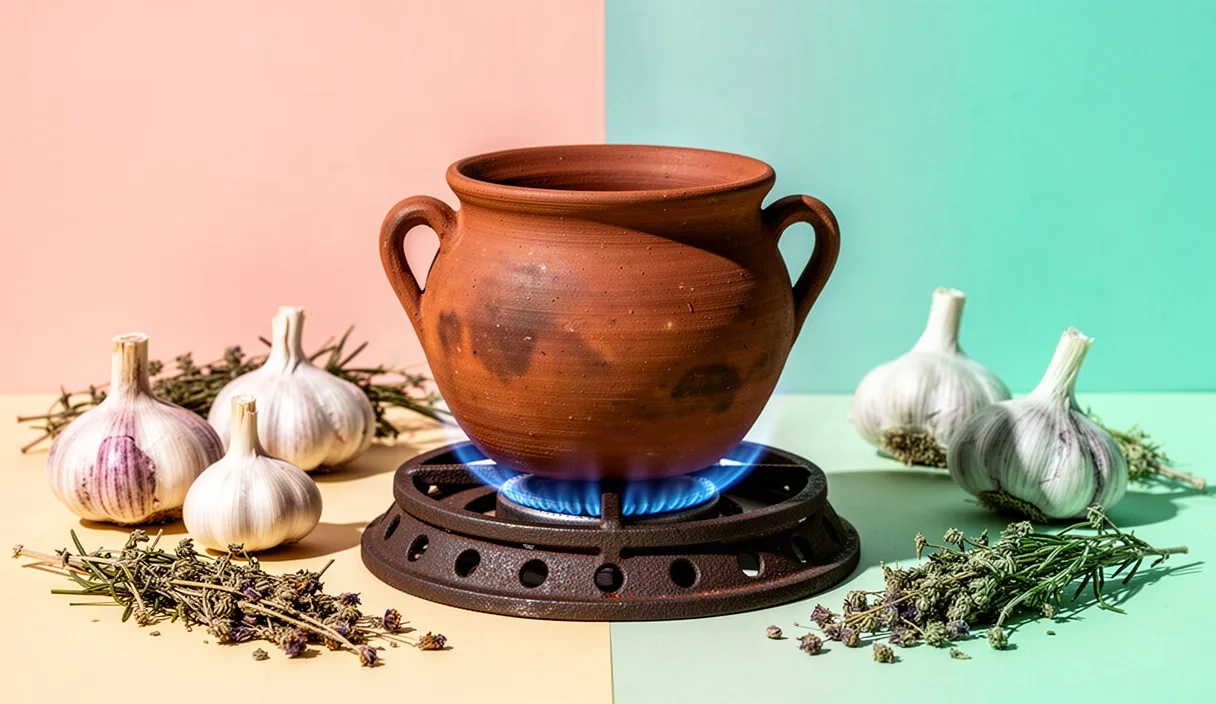
Walk through the outdoor stalls on Ridley Road on a wet November morning and you will see unglazed earthenware sitting out on wooden crates, cold to the touch and smelling of damp riverbank. These are rough-cast pots, cazuelas from Spain, micaceous pots from New Mexico, and red-clay bean pots from Portugal or Morocco. They are intended for gentle wood embers or low embers raked to the side of a bread oven, yet most of us bring them home to a narrow tenement kitchen and sit them straight on top of a modern domestic ring burner. That open blue gas flame hits clay with intense, pinpoint heat that can crack a raw vessel in under two minutes if you do not understand the physics of porous mud.
Cooking in raw clay is not an eccentric hobby; it produces beans that do not burst their skins, broths that stay sweet without burning, and onions that melt into silk instead of scorching. But raw earthenware has no glassy melt to hold it together, and it holds water within its walls like a sponge. Modern gas lines deliver high-pressure fuel that creates sudden hotspots across a concentrated circle. Bridging the gap between a traditional earthenware pot and a stainless steel cooker top takes patience, modest heat distribution, and a disciplined approach to moisture management.
Checking pottery wall thickness and glaze status
Before any pot meets a flame, you must assess its construction. Clay behaves according to its porosity, its temper (the grit, grog, or sand mixed into the earth), and the uniformity of its walls. Mass-produced ornamental pieces sold in garden centres or interior shops often use fine, dense slip that cannot expand when heated. Cookware clay, by contrast, feels slightly gritty to the fingernail and displays visible variations in grain. If you tap the rim with your knuckle, a sound cooking pot should give a low, dull thud rather than a high, vitreous ping. A high ring indicates high-fired stoneware or porcelain, which expands too quickly and shatters over direct flame.
Wall thickness determines how heat migrates from the base through the sides of the dish. Thin bases create hot spots, while thick bases absorb energy slowly and distribute it outward. Use a pair of sliding callipers or a marked wooden skewer to measure the rim and, where possible, compare it against the weight of the bottom. A vessel with an 8 millimetre wall will tolerate direct radiant heat far better than a delicate 4 millimetre dish, but it demands twice as much warm-up time.
| Pottery Variety | Average Wall Thickness | Surface Treatment | Thermal Tolerance |
|---|---|---|---|
| Micaceous Earthenware | 5 to 7 millimetres | Burnished raw clay with natural mica flakes | High; flakes slide against each other as clay expands |
| Black Clay (Chamba style) | 6 to 9 millimetres | Burnished, smoked slip; semi-porous | Moderate to high; requires gradual preheating |
| Traditional Red Earthenware | 8 to 12 millimetres | Completely unglazed, coarse sand temper | Moderate; vulnerable to sharp pinpoint heat |
| Half-Glazed Terracotta | 7 to 10 millimetres | Lead-free silica glaze inside, bare outside | Low to moderate; glaze expands at a different rate than the body |
Pay close attention to partial glazes. Many Mediterranean pots feature a clear or yellow glaze across the interior bowl while leaving the base and outer walls bare. The boundary line where glaze meets raw clay is a zone of structural tension. Glass expands at a different rate than porous earth; if heated too quickly, the interior glaze will craze, pop, or shear away from the terracotta body. If you intend to use half-glazed pots on a gas range, treat them with even greater caution than completely unglazed pieces.
Selecting the right cast iron flame tamer
A bare gas jet creates a ring of concentrated flame directly against the clay surface, leaving the centre and outer edges cold. This differential is what breaks earthenware. You must never place an unglazed clay pot directly onto the cast iron spider of a domestic gas hob without an intervening distributor plate, commonly called a flame tamer or heat diffuser.
The thin, perforated tin discs sold in high-street hardware shops are inadequate for heavy clay pots. They warp under prolonged heat, allow hot gas to shoot through the small perforations, and provide almost no thermal mass. You need a solid cast iron diffuser with a minimum thickness of 6 millimetres, preferably without holes. A plain, flat cast iron griddle plate or a seasoned skillet without raised rims can serve the same function. The goal is to convert the sharp, biting blue jet into a wide, uniform bed of radiant heat that simulates the hearth floor.
- Diameter match: The diffuser plate must be at least as wide as the base of the pot. If the plate measures 20 centimetres and the pot base measures 26 centimetres, the outer edge of the pot will remain cold while the center expands, creating radial fracture lines.
- Plate mass: A heavier disc of 1.5 to 2.2 kilograms takes 8 minutes longer to warm up, but it prevents the gas flame from cycling spikes of heat into the pot base.
- Surface contact: Look for a tamer with a flat top. Diffusers with deep concentric ridges reduce the surface contact between iron and clay, forcing air pockets to act as insulating gaps.
Position the diffuser directly onto your gas hob grate, ensuring it sits dead level. An unlevel plate causes cooking fat or cooking water to pool on one side, which introduces temperature imbalances across the base of the earthenware.
The slow rice starch curing method
Raw clay is filled with microscopic voids. Left untreated, cooking oils will seep deep into the porous walls, turn rancid, and degrade the matrix over time. Boiling starch inside the pot seals these tiny capillaries with an insoluble, natural paste that hardens as it dries. While some Mediterranean traditions rely on rubbing raw garlic and olive oil into the clay, the rice starch simmer remains the safest, cleanest method for town kitchens.
Do not use polished instant rice for this procedure. You want cheap, broken white rice or short-grain pudding rice, which sheds a heavy concentration of amylose and amylopectin into the water as it cooks down.
- Submersion soak: Submerge the entire pot and its lid in a deep basin of clean, tepid tap water for at least 14 hours. The clay will hiss and release streams of tiny air bubbles as its pores fill with water. If the pot is dry when it meets heat, the moisture from your food will rush inward unevenly and fracture the walls.
- Draining: Remove the pot from the water and let it sit on a clean cotton tea towel for 45 minutes until the exterior surface is no longer glistening wet, but still cold and visibly damp.
- Slurry preparation: Place the pot onto your cast iron flame tamer. Pour in 120 grams of short-grain white rice and 1.5 litres of room-temperature water. Do not add salt, oil, or aromatics. The liquid must fill the pot to roughly three quarters of its total volume.
- Slow cooking: Ignite the gas burner at its absolute lowest setting. Allow 25 minutes for the diffuser and pot to warm gently. Gradually increase the flame by a fraction until the water reaches a very lazy, rolling simmer. Let this thin rice porridge simmer uncovered for 2.5 hours.
- Resting and cooling: Turn off the gas hob. Leave the pot on the burner with the porridge inside until everything has cooled completely to room temperature, which often takes 4 to 6 hours. Do not rush this process.
- Scrape and rinse: Pour out the thickened starch slurry. Rinse the interior using warm water and a soft bristle brush. You will notice the inner surface now feels smooth and waxy rather than abrasive.
Managing thermal shock on domestic gas ranges
Thermal shock occurs when one portion of an object expands while an adjacent portion remains rigid. Clay has poor tensile strength; it can bear heavy compressive loads, but it pulls apart easily under uneven expansion. Domestic gas ranges provide instantaneous heat, which is the primary enemy of unglazed mud.
Every time you cook, you must observe a strict temperature curve. Start the burner at low for the first 12 minutes. Only after the rim of the pot feels warm to the touch should you bring the flame up to medium-low. Standard earthenware should never be cooked over a high gas setting. If a recipe calls for a vigorous boil, bring the contents to a simmer gently and put the lid on; the enclosed steam and the radiant heat from the clay walls will build sufficient temperature without blistering the base.
Liquids introduced during cooking present a frequent point of failure. Pouring cold stock, fridge-cold wine, or chilled tap water into a hot clay casserole will instantly shatter the base. Keep a small saucepan of water or stock simmering on a neighbouring back ring, and ladle hot liquid into the pot as needed. Conversely, never place a hot pot onto a cold slate worktop, a stainless steel draining board, or a wet tea towel. Keep a thick wooden board or a woven straw mat beside the cooker so the base can cool down at an even, leisurely rate.
Proper washing and sun drying procedures
A cured clay pot is an organic, breathing object. Commercial dishwashing liquids contain synthetic surfactants and perfumes that penetrate deep into the unglazed walls. Once soap enters the clay, it cannot be rinsed away; it will leach directly into your next pot of beans or braised meat, imparting a bitter, chemical flavour. Dishwashers are strictly out of the question due to aggressive detergents, intense water jets, and harsh drying cycles.
Wash the pot while it is still lukewarm, using hot water, a brush made of stiff natural tampico fibres, and a handful of coarse rock salt or baking soda if you need an abrasive. For stubborn crusts of burnt food, fill the pot with hot water, add two tablespoons of sodium bicarbonate, and let it stand on the counter for 40 minutes. The residue will lift away without damaging the starch barrier you created during curing.
Drying requires vigilance, particularly during damp autumn and winter months in houses without continuous heating. Earthenware will retain moisture inside its core for days after washing. If you store a damp clay pot in a dark, closed kitchen cupboard, white mold will bloom across the base within a week.
- Towel dry: Rub the vessel thoroughly with a dry linen cloth to strip off surface moisture.
- Air flow: In warm weather, place the pot upside down on a drying rack outdoors in direct sunlight for 6 hours. Sun rays kill surface bacteria and pull residual moisture out through the porous base.
- Winter drying: In cold or wet seasons, set the pot on a wooden trivet near a radiator, or place it in an unheated gas oven that still retains gentle warmth from earlier baking, leaving the door cracked open 5 centimetres.
- Storage: Store the pot with the lid off or inverted with a folded paper towel tucked between the rim and the lid to allow air circulation. Never stack heavy metal pans on top of unglazed earthenware.
Common mistakes
One frequent error is dry heating the pot. You must never place an empty clay pot onto a lit burner to sear meat or fry spices as you would with a heavy enamelled Dutch oven. Always add your cooking fat, aromatics, or liquid before the heat goes on, or add them while the pot is barely warm so the moisture lubricates the clay as it expands.
Another misstep is using metal utensils. Heavy iron spoons and steel spatulas scrape away the protective starch seal and chip the rim. Use rounded boxwood, olivewood, or silicone spoons. Finally, do not ignore hairline cracks. A faint fissure on the base is a warning that thermal shock has begun. If you spot a hairline crack, do not use the pot over gas again until you have inspected whether it leaks water; if liquid seeps through, the pot must be retired from direct heat and relegated to cold pantry storage or dry baking.
Practical next steps
Before lighting your cooker, examine your pot carefully for manufacturing marks, stickers, or hidden chips along the bottom edge. Measure your hob burners and procure an appropriately sized solid cast iron diffuser plate from an ironmonger or specialist cookware supplier. Set aside an unhurried weekend afternoon for the soaking and starch-curing procedure, and clear a ventilated shelf space where the vessel can dry out completely between meals.
If you suspect an antique or imported pot contains heavy metals in a decorative glaze, test kits are widely available, or you can consult an experienced ceramic technician before cooking. Start your first meal with something forgiving, such as a slow-simmered pot of dried pinto or broad beans cooked with an onion, a thumb of pork fat, and hot water. Treat the clay as earth rather than iron, keep the flame modest, and the pot will outlive your kitchen range.