When the November frost settles into the valley and the wind barrels down from the granite ridges, the kitchen becomes the center of every working hour. In our corner of the foothills, curing meat has never been an exclusively outdoor pursuit reserved for expansive smokehouses. Farmhouses along the river road have long relied on indoor hearths and heavy lidded pots to impart a clean, resinous wood smoke to small cuts of cured breast meat, river trout, and autumn curds without letting the winter chill inside.
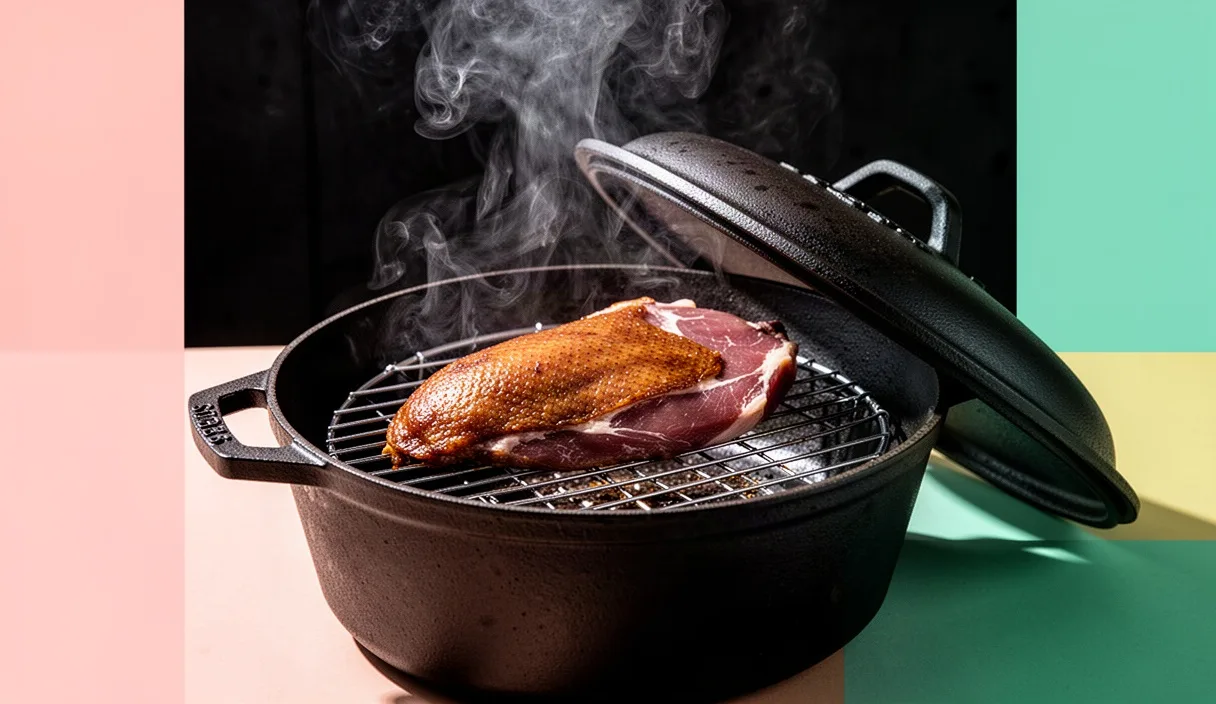
Stove-top smoking, often dismissed as an urban shortcut, is in truth a disciplined preservation craft. By building an isolated smoke chamber inside an ordinary Dutch oven or a heavy cast-iron skillet, you gain precise control over heat transfer and smoke density. The method requires no backyard fire pit, yet it yields charcuterie with a balanced bark, deep amber color, and the clean perfume of alpine herbs, black tea, and dry grain.
Setting up foil shielding inside heavy cookware
The foundation of indoor smoking lies in heat retention and complete separation between your combustible base and the food grate. A five-quart or six-quart enamelled cast-iron Dutch oven, or an uncoated raw cast-iron pot, provides the thick thermal mass needed to char dry aromatics steadily without warping. Avoid thin stainless steel stockpots or non-stick vessels; thin pans create hot spots that scorch the smoking base into acrid soot, while non-stick coatings degrade and release toxic fumes at dry-char temperatures.
Line the bottom and interior walls of the vessel with two overlapping sheets of heavy-duty aluminum foil. Standard household foil tears under the weight of metal racks and allows oils to bake directly into the pot, which creates hours of scrubbing and permanent discoloration. Press the heavy foil firmly against the bottom, smoothing out large air pockets, and extend the edges up the walls so they sit flush against the rim. This liner catches dripping fats, isolates the ash, and makes cleanup a matter of lifting out a cool bundle of foil.
To support the charcuterie above the smoldering fuel, build a stable platform. You need at least 1.5 inches of clearance between the dry fuel layer and the food. If your grate sits directly on the smoking mixture, the fat will drip onto the hot sugars and grains, flaring up and scorching the bottom of your meat with bitter, black grease.
- The crumpled foil ring: Roll a long strip of aluminum foil into a thick coil, roughly the thickness of a garden hose, and shape it into a circle on the bottom of the pot. Place a round wire steaming rack directly on top of this ring.
- Perforated drip shield: For fat-heavy cuts such as duck breast or pork belly, cut a small circle of foil slightly smaller than your wire rack. Poke 12 to 15 pinholes through it with a skewer and place it under the meat to deflect the heaviest oil drops away from the burning fuel.
- Double-seal lid configuration: Cover the top of the pot with a wide sheet of foil before pressing the heavy lid down over it. Fold the outer foil edges up over the lid rim to create a mechanical gasket that stops smoke from leaking past the pot seam.
Selecting tea grades, raw grains, and spices for smoke
Wood chips demand substantial oxygen to smolder cleanly, which makes them temperamental inside a sealed stove-top Dutch oven. They often produce thick, gray, bitter creosote when deprived of airflow. Instead, traditional alpine and northern hearth methods rely on a dry blend of broken tea leaves, uncooked pantry grains, brown sugar, and resinous aromatics. This mixture chars uniformly under indirect heat and yields a sweet, thin blue smoke that penetrates meat tissue without overwhelming its cured flavor profile.
The base fuel requires three distinct components: a carbon source for steady smolder, a starch to sustain the ember, and a sugar to glaze the exterior of the meat. Raw white rice or rolled oats provide the reliable thermal bulk. Light brown sugar or demerara sugar melts, caramelizes, and chars slowly, releasing airborne volatile compounds that tint the meat mahogany and offset the astringency of cured salts.
| Smoke Material | Recommended Variety | Aromatic Profile | Best Pairing |
|---|---|---|---|
| Black Tea | Lapsang Souchong or Assam BOP | Pine tar, dark malt, resin | Venison, duck, beef shank |
| Grain Base | Medium-grain white rice | Neutral, toasted cereal | Foundation for all blends |
| Mountain Herbs | Dried juniper berries, crushed | Pine needle, dry gin, pepper | Wild boar, pork jowl |
| Citrus Peel | Dried bitter orange or lemon | Bright, clean, acidic oils | River trout, goat cheese |
Blend the base in small quantities just before heating. A standard formula for a five-quart vessel contains 3 tablespoons of raw white rice, 2 tablespoons of loose black tea, 1 tablespoon of brown sugar, 8 lightly cracked juniper berries, and 2 dry bay leaves torn into bits. Avoid using damp ingredients or fresh herbs; excess water generates steam inside the pot, which dilutes the smoke density and softens the surface of the meat into a gray, boiled skin instead of a taut charcuterie casing.
Managing range hood airflow and heat intensity
The stove top demands vigilant ventilation control. Before turning on any gas burner or induction ring, turn your range hood to its maximum setting. If your range hood recirculates air back into the kitchen rather than ducting it through an exterior wall, crack a window across from the stove to establish a cross-draft toward the nearest outside exit. Mountain homes in winter are sealed tight to hold warmth, which makes indoor air management critical.
Heat management inside the pot follows a strict two-stage process. You do not leave the burner on high heat throughout the process. High heat produces scorching, which destroys delicate spices and leaves an acrid, chemical flavor on the meat. The objective is to bring the fuel blend to its ignition point where it smolders without an open flame, and then drop the heat to a gentle maintenance level.
Place the uncovered pot, loaded with foil and the dry fuel blend, over medium-high heat on the stove. Watch the surface of the mixture closely. After 3 to 5 minutes, you will see thin tendrils of white smoke rise from the melting sugar and toasted grains, accompanied by a faint crackling sound. Let this develop for 45 seconds until the smoke turns slightly bluish and carries a fragrant, toasted tea aroma. Do not wait for billows of dense, acrid brown smoke, which indicates scorched sugar.
As soon as that thin blue smoke appears, place your rack and prepared food into the pot, lay the top foil sheet over the rim, press the heavy lid down firmly, and immediately turn the burner to low. The heavy base of the cookware will hold the accumulated heat and continue driving the smolder. If you see wisps of smoke escaping around the lid seal, wrap a damp kitchen towel around the rim seam to block the vent. Do not leave damp towels unattended over an open gas flame.
Timing the smoke bath for poultry, fish, and firm cheese
Different proteins absorb smoke compounds at drastically different rates depending on surface moisture, fat concentration, and internal temperature. Cold foods form condensation when introduced to warm smoke, and that condensation catches smoke particles rapidly. However, excessive moisture turns the surface acidic. Every piece of food must be cured, rinsed, and dried in a cold pantry or refrigerator for at least 4 hours until a sticky, matte skin, known as a pellicle, forms on the exterior.
Poultry cuts like duck breasts or pheasant thighs require enough heat to render surface fat while the smoke penetrates. A cured duck breast, salt-brined for 12 hours with juniper and thyme, needs 12 to 14 minutes over low heat in the Dutch oven, followed by 10 minutes off the heat with the lid undisturbed. This gentle carryover cooking lets the residual heat finish melting the fat without boiling the delicate breast meat.
River trout and Arctic char are far more fragile. Fish proteins seize and squeeze out white albumen when exposed to sudden high heat. Keep the burner on low for only 5 minutes to generate smoke, then slide the covered pot completely off the burner. Let the fish steep in the trapped smoke chamber for 8 to 10 minutes off the heat. The smoke will infuse the rich oils in the fish flesh while the gentle internal steam cooks it just to the point of flaking.
Firm alpine cheeses such as young Comté, Gruyère, or aged goat curds cannot handle lingering heat, or they will collapse into an oily puddle at the bottom of the pot. To cold-smoke cheese on the stove top, run the pot empty with the fuel blend over heat until smoke fills the chamber. Take the pot completely off the stove, remove the lid to let the internal temperature drop below 85 degrees Fahrenheit, insert a small bowl filled with ice beneath the wire rack, place the chilled cheese on the rack, and clamp the lid down. Let the cheese sit in the stagnant, cooling smoke bath for 6 to 8 minutes. Remove it immediately and refrigerate it uncovered for 2 hours to set the rind.
Resting and slicing smoked meats to lock in moisture
The transformation does not finish when you lift the lid off the Dutch oven. When hot meat is removed from a smoke chamber, volatile phenolic compounds sit concentrated on the exterior surface. If you slice into a duck breast or pork tenderloin immediately, these compounds taste aggressively bitter, like cold campfire ash, while the internal juices will pour out over the cutting board, leaving the interior meat dry and stringy.
Transfer the smoked meat to a clean wire cooling rack set over a baking sheet. Let it sit at room temperature for 20 minutes to equalize internal temperature. Once the meat cools to room temperature, wrap it loosely in unbleached butcher paper or parchment paper and transfer it to the refrigerator. Allow it to cure in the cold for at least 12 hours, or ideally 24 hours, before slicing. This resting phase allows the exterior smoke rings to migrate inward through the muscle fibers, mellowing the exterior bite and seasoning the entire cut uniformly.
When preparing the charcuterie board, knife technique determines the eating experience. Smoked meats have tight, cured muscle fibers that become chewy if cut with the grain. Use a sharp slicing knife with a narrow blade, rather than a broad chef knife, to minimize friction and prevent tearing the smoked bark away from the meat.
- Inspect the grain pattern of the cured cut and align your knife strictly perpendicular to the direction of the muscle fibers.
- Slice the meat paper-thin, aiming for a thickness of no more than 1/16th of an inch. Translucent slices melt on the tongue, allowing the fat and the herbal smoke notes to release gradually.
- Serve the charcuterie slightly below room temperature, around 60 degrees Fahrenheit. If served ice-cold straight from the refrigerator, the rendered fats remain solid and mask the nuances of the tea and juniper infusion.
Common mistakes
The most frequent error is rushing the surface drying step. If meat is damp when it enters the smoke pot, smoke compounds dissolve into the moisture beads, creating carbonic acid that leaves a sour, metallic tang on the palate. Always ensure the food is dry to the touch with a visible, shiny pellicle before it enters the vessel.
Another common mistake is lifting the lid during the smoking process. Peeking releases the trapped volatile oils and drops the pot temperature rapidly. Once you lift the lid, the smoke escapes into your kitchen, and the heat loss requires reheating the pan, which burns the sugar base and ruins the batch. Trust your timer and leave the seal intact until the designated resting period has ended.
Finally, avoid adding resinous softwood sawdust like pine or cedar to stove-top blends. While outdoor smokehouses in the mountains sometimes utilize spruce boughs for heavy bacon, the confined space of a Dutch oven concentrates wood terpenes to toxic and unpalatable levels. Stick strictly to food-grade teas, raw grains, clean fruitwood twigs, and dry kitchen spices for stove-top operations.
Next steps
Start your first trial with a small cut of boneless poultry or a single fillet of trout before attempting dense red meats or whole muscles. Pick up two bone-in chicken thighs or a farmed trout fillet from your local butcher, rub them with coarse sea salt, cracked black pepper, and crushed juniper, and let them rest in your refrigerator overnight on an open plate to develop that crucial dry pellicle.
Assemble your cookware and inspect your range hood filter to make sure it is clean and free of grease deposits that could hinder airflow. Build your first dry fuel packet using basic Assam black tea, white rice, and brown sugar. Once you master the heat cycles and resting periods on basic poultry, you can begin harvesting autumn aromatics, such as dried mountain sage, cherry bark, and dried apple peels, to build signature charcuterie profiles tailored to your own winter table.